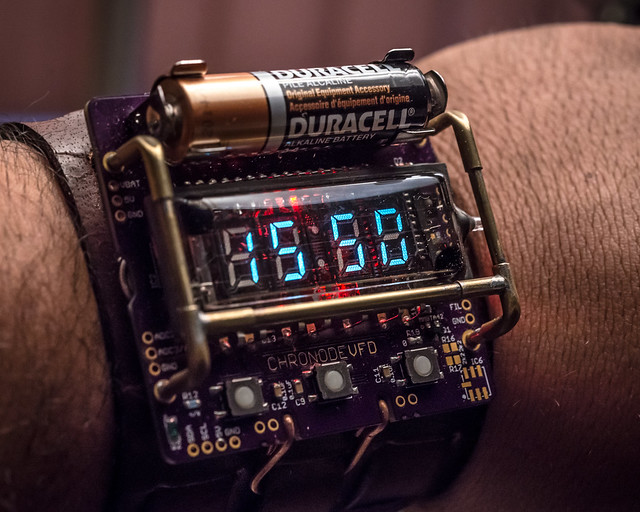
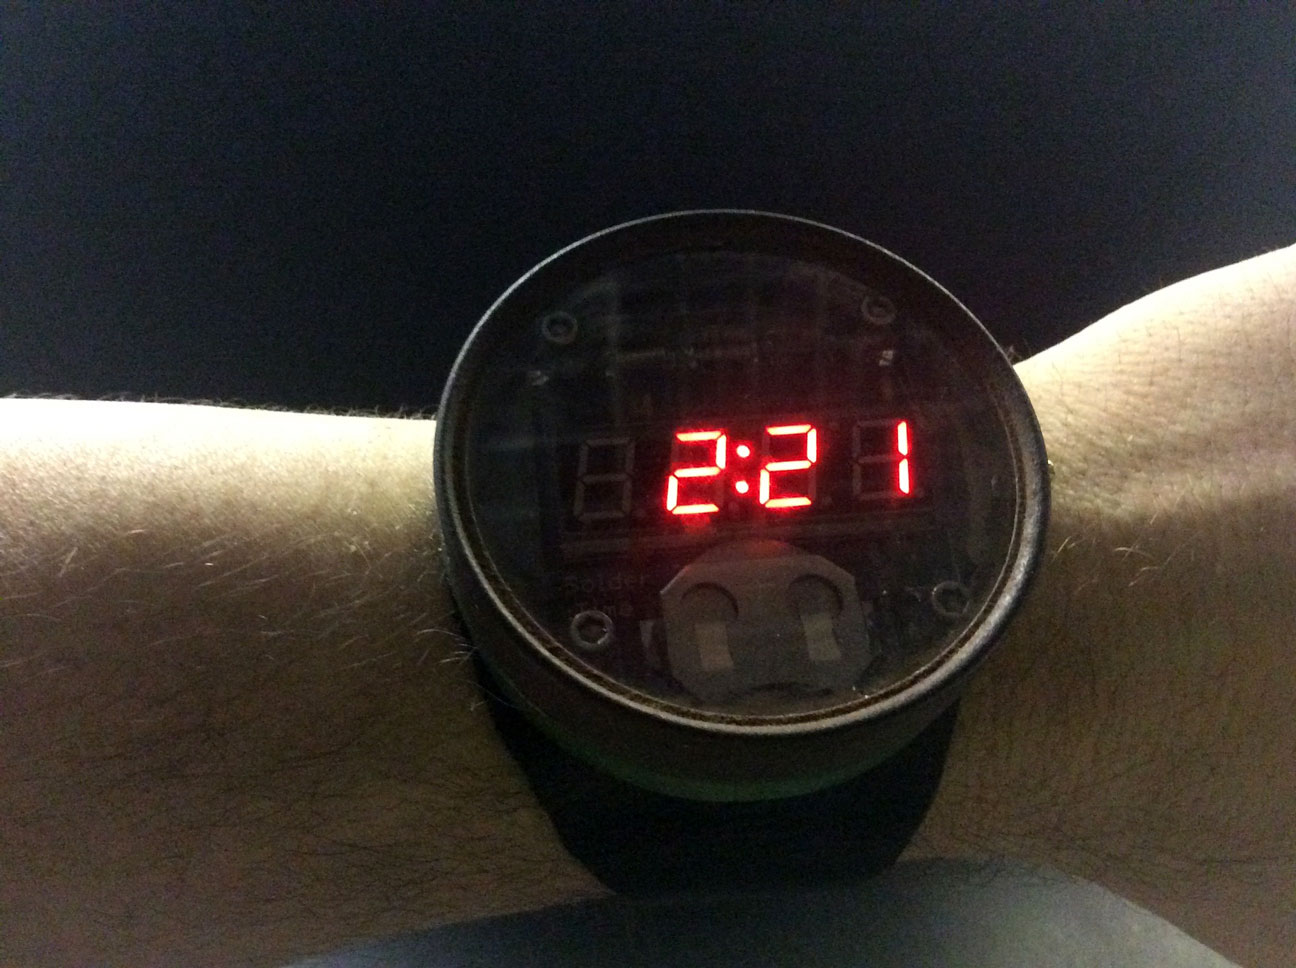
I was excited to receive the original Solder: Time watch by Spikenzie Labs as a birthday present and I thought it would make a good project for a steampunk watch. I have been a fan of nixie tube watches for a while, in particular, the ChronodeVFD cyberpunk wristwatch by J. M. De Cristofaro which isn’t strictly a nixie tube watch, but its a great watch nonetheless.

I’ve looked at a wide variety of other nixie tube watches but didn’t want to buy one, I mean where is the fun in that? So as a way of building up to my own nixie tube project I thought I’d play around with the Soldertime Watch.
Also available from:-
There is now a Soldertime II watch which is much more hackable available also through Spikenzie Labs and also through Adafruit but I like the feel of the original and it seemed to fit the aesthetic I was after for a steampunk watch.

I had some old tins lying around I thought they’d be great to house the watch and I even had one with a glass lid and just happened to be an almost perfect fit for the project.
Soldering the watch was a breeze and easy for beginners to get more confident with soldering and the watch also has enough some options for tinkering as “the bottom side I2C lines are broken out, for hacking, and integrating RTC into other projects. There are also pads on the backside of the PCB for DC supply, as well as an ‘always-on’ function.” So their site explains. I can explore that later, for now I just want to create a great-looking and oversized watch.
First I soldered up the watch and put it in its perspex case by following the very clear instructions on their website. The case part of the project was probably the most fiddly.

Next I drilled some holes in the circular tin to fit the watch switch and straps. The fit was snug but there was some manoeuvrability.
Once I had done that it was relatively easy to slip the watch into the case.

Next I planned to add a leather strap. The first one is just temporary to get the watch built but I plan to add a more stylish strap later on once I have practised my stitching techniques a bit.

The strap was quite easy to add, I just made some slots in the leather and fed the velcro straps through them. This attached the leather to the watch quite effectively for a close fit. Then I just stitched the buckle I had to the leather and put in a couple of holes to fix it to my arm.
The next problem I found was that once I had assembled the watch and put it on, I could not quite reach the perspex button from the hole in the side. I had added a small cylinder of brass to house the button mechanism on the side but it kept getting caught. So I decided that it would be better to put in a brass button to replace the perspex one and extend it so it came out of the side far enough to be able to select it.

This took quite a while to cut and file down to fit the watch but was quite satisfying to do and purely by luck fitted the watch perfectly. Now it has a satisfying click when you turn it on as you can see in the following clip.
The next job will be to play around with the electronics. I quite like the idea of the watch being on continuously so I will start looking at the options for tinkering with the electronics.
I will post an update again once I have done that and added a new strap for the watch.


Leave A Comment
You must be logged in to post a comment.