
As a potential workshop to explore prototyping with cardboard, we have been investigating ways of building machines with cardboard as a material. Its a material that is available in abundance and can be worked into the most ingenious creations. Just look at these examples
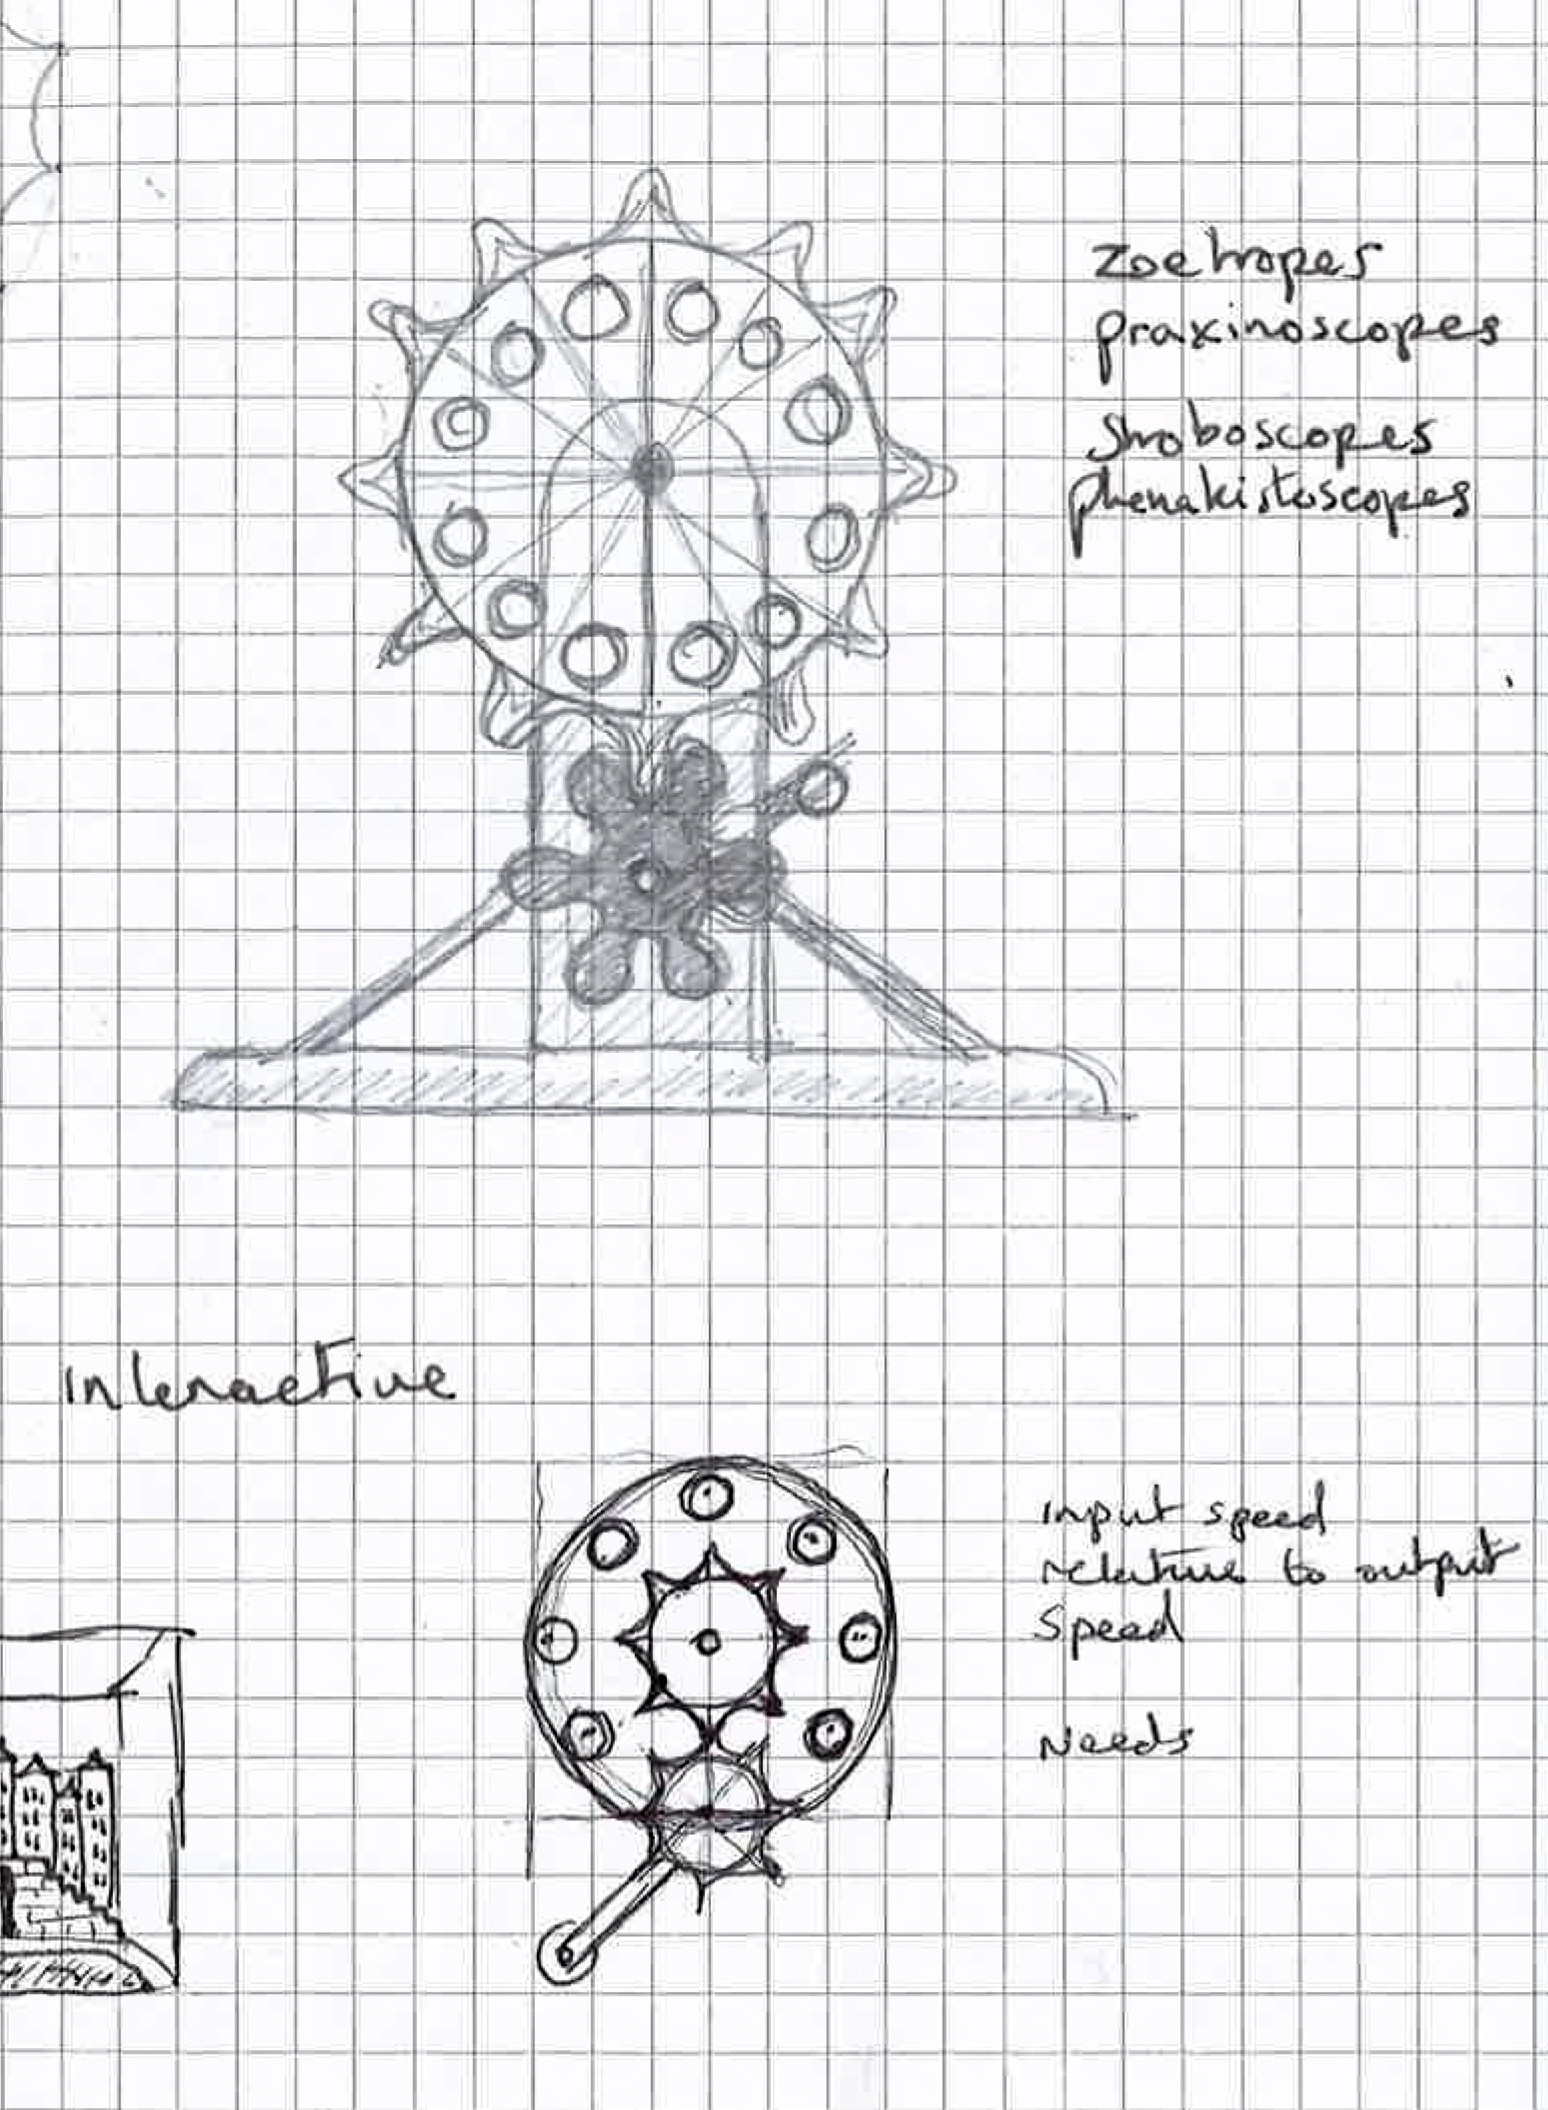
So I thought that I would explore how I might build an animation machine using cardboard. I am fascinated by early animation machines such as Zoetropes and Stroboscopes and thought the best way to create a nice visual machine would be to combine a phenakistoscope and a stroboscope. A Phenakistoscope works by animating a circular animation sequence either by cranking a handle or attaching a motor. A stroboscope adds to the experience by making a light flash on an off in time with the animation sequence. By building a machine which incorporates aspects of both means I can create a nice visual prototype which could be developed down the line perhaps making a wooden version with laser cut pieces.
I started sketching some ideas without having a clear idea of design. In a later version I will transform the patterning and shape of the pieces but in the cardboard stage I just want to concentrate on the mechanisms and general construction.
Once I cut the cogs and general structural components, I spend a short time trying out different nuts and bolts to secure the main cogs and circular shapes to the stand. Working with corrugated cardboard and metal nuts and bolts is very quick to prototype because you can easily make a pilot hole in the cardboard and screw in the bolt and it fits quite snuggly.
Once I had all the basic components assembled I tried to move the cogs to see if I could turn the wheel at the back to make the scene animate.
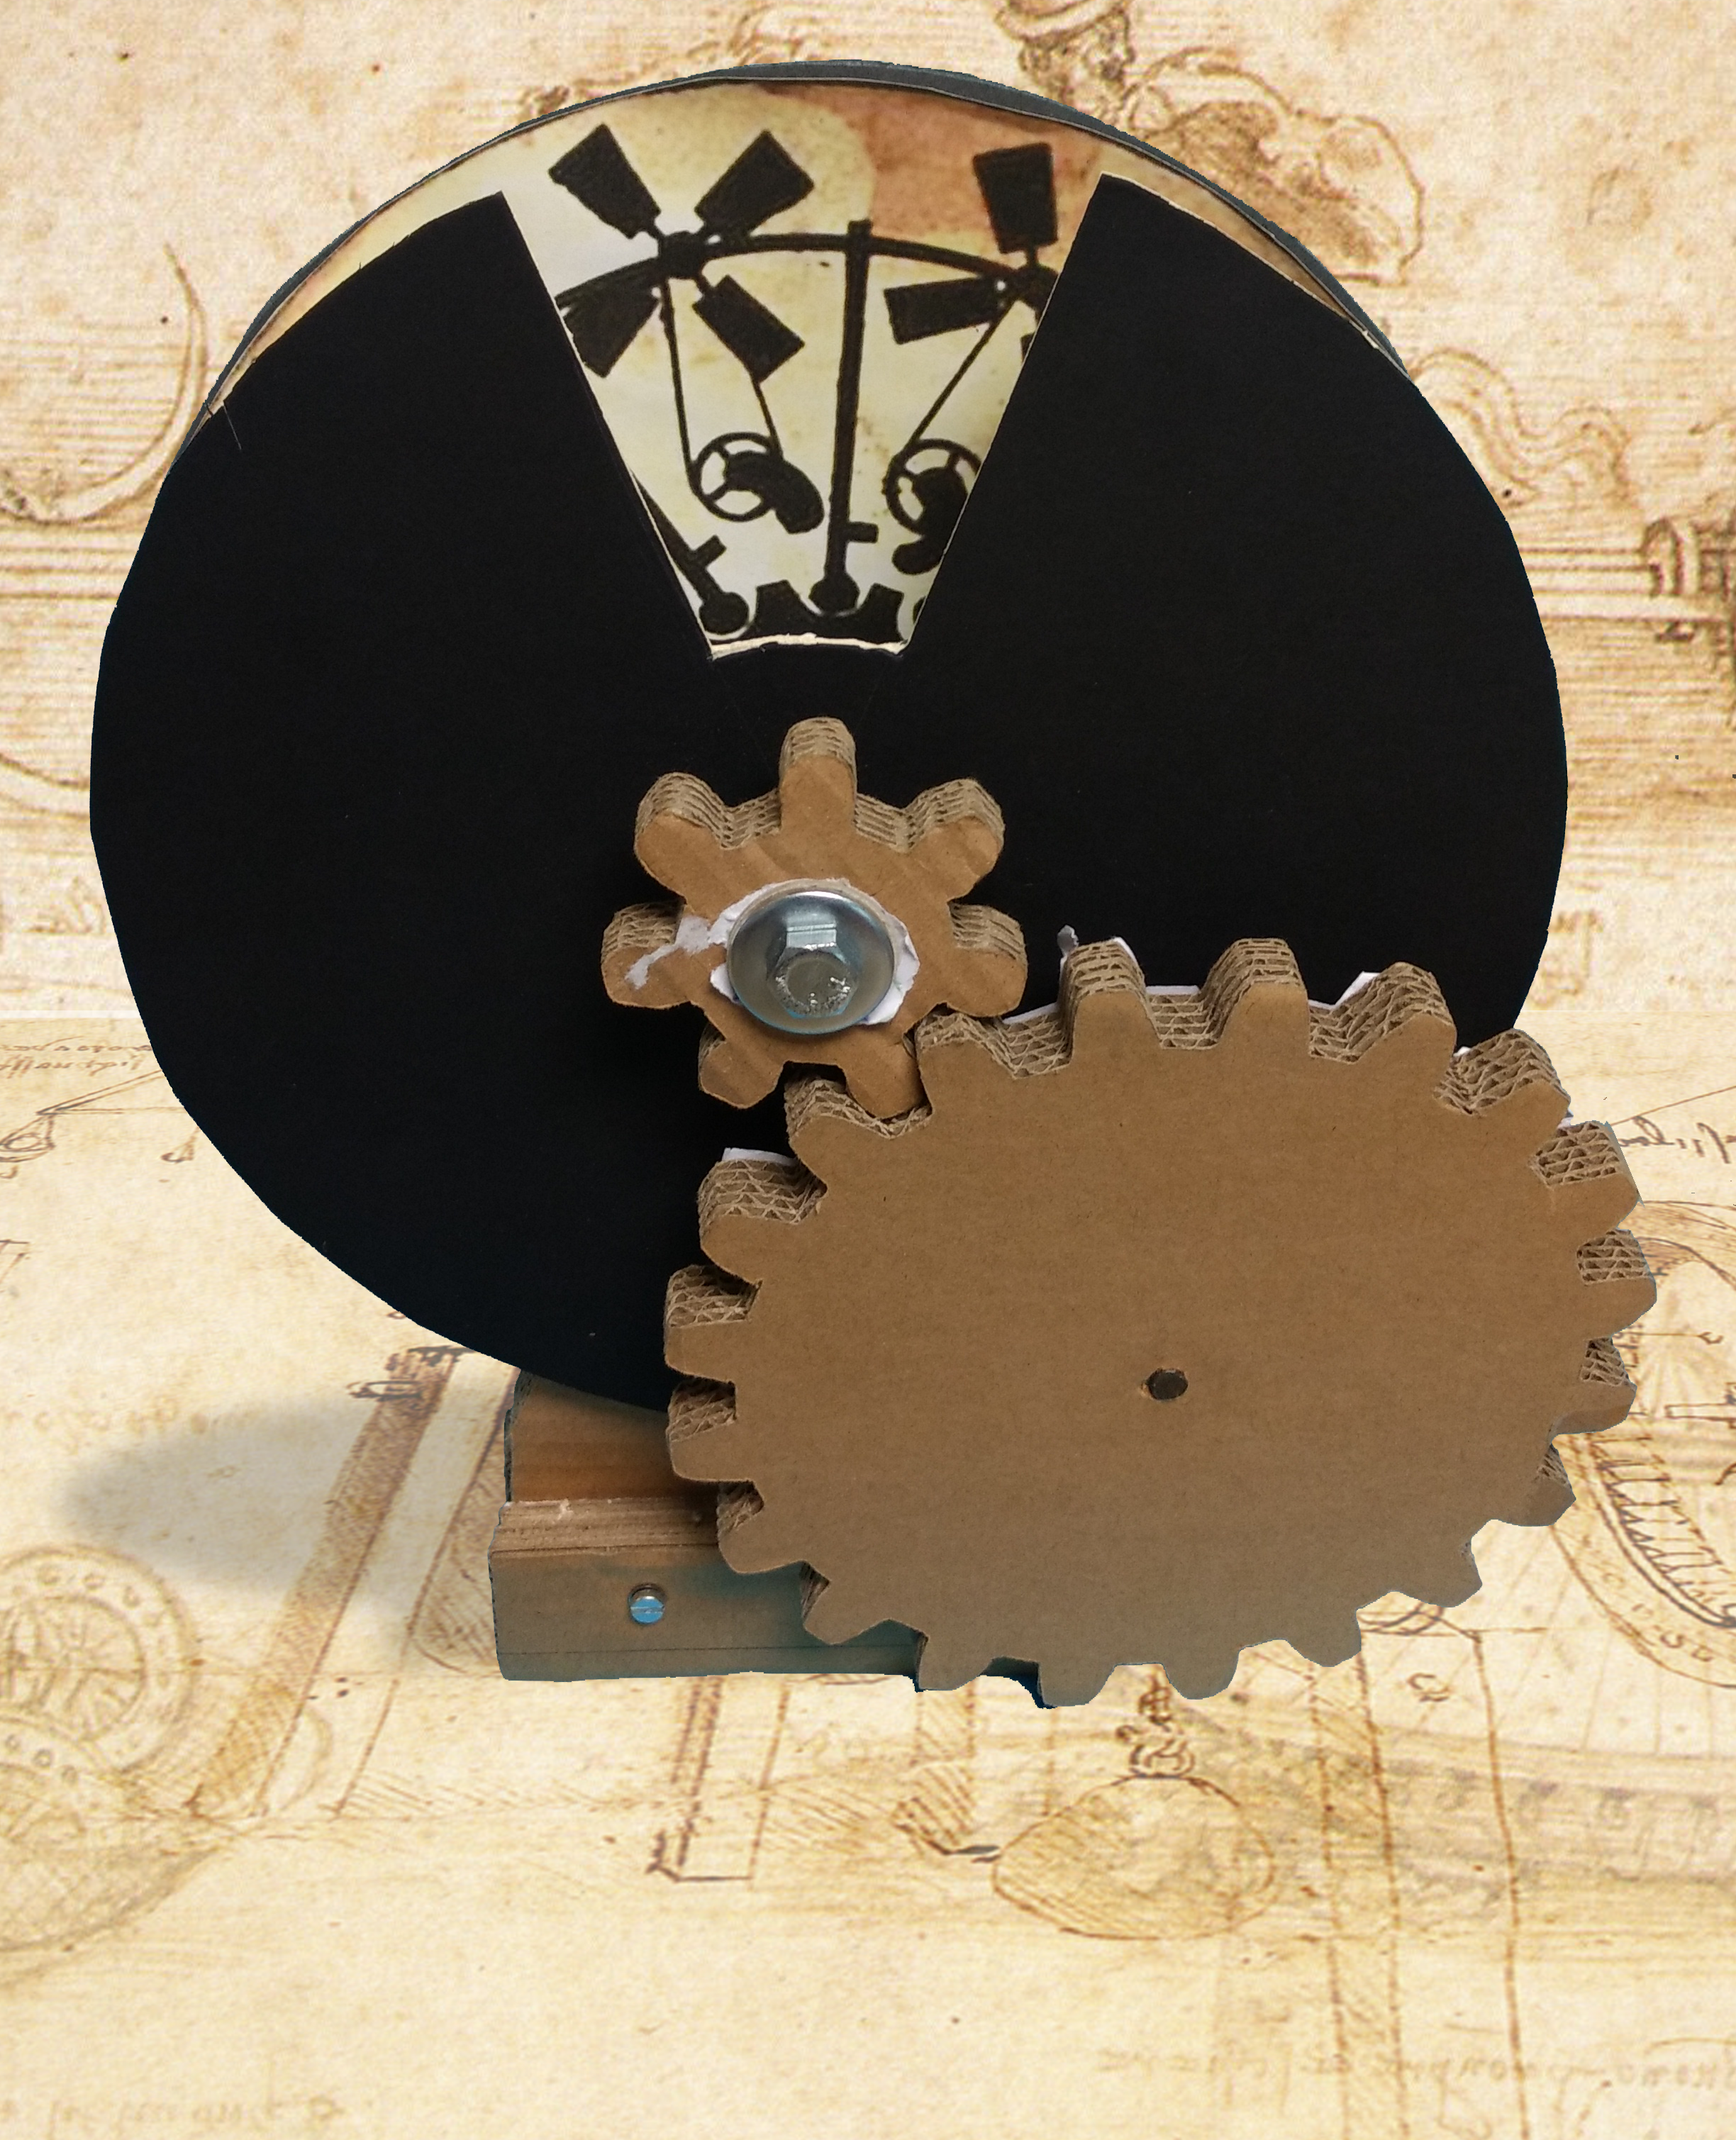
The problem with it soon became apparent. The front panel wasn’t aligned with the cogs so they kept catching. Also the front panel had no adjustment which would be needed to fine tune the gap for different animation sequences.

The sections are now thicker which makes it more sturdy but I need to make sure the cogs are rotating in the correct position so will need to make some guides so that they rotate in the correct position.

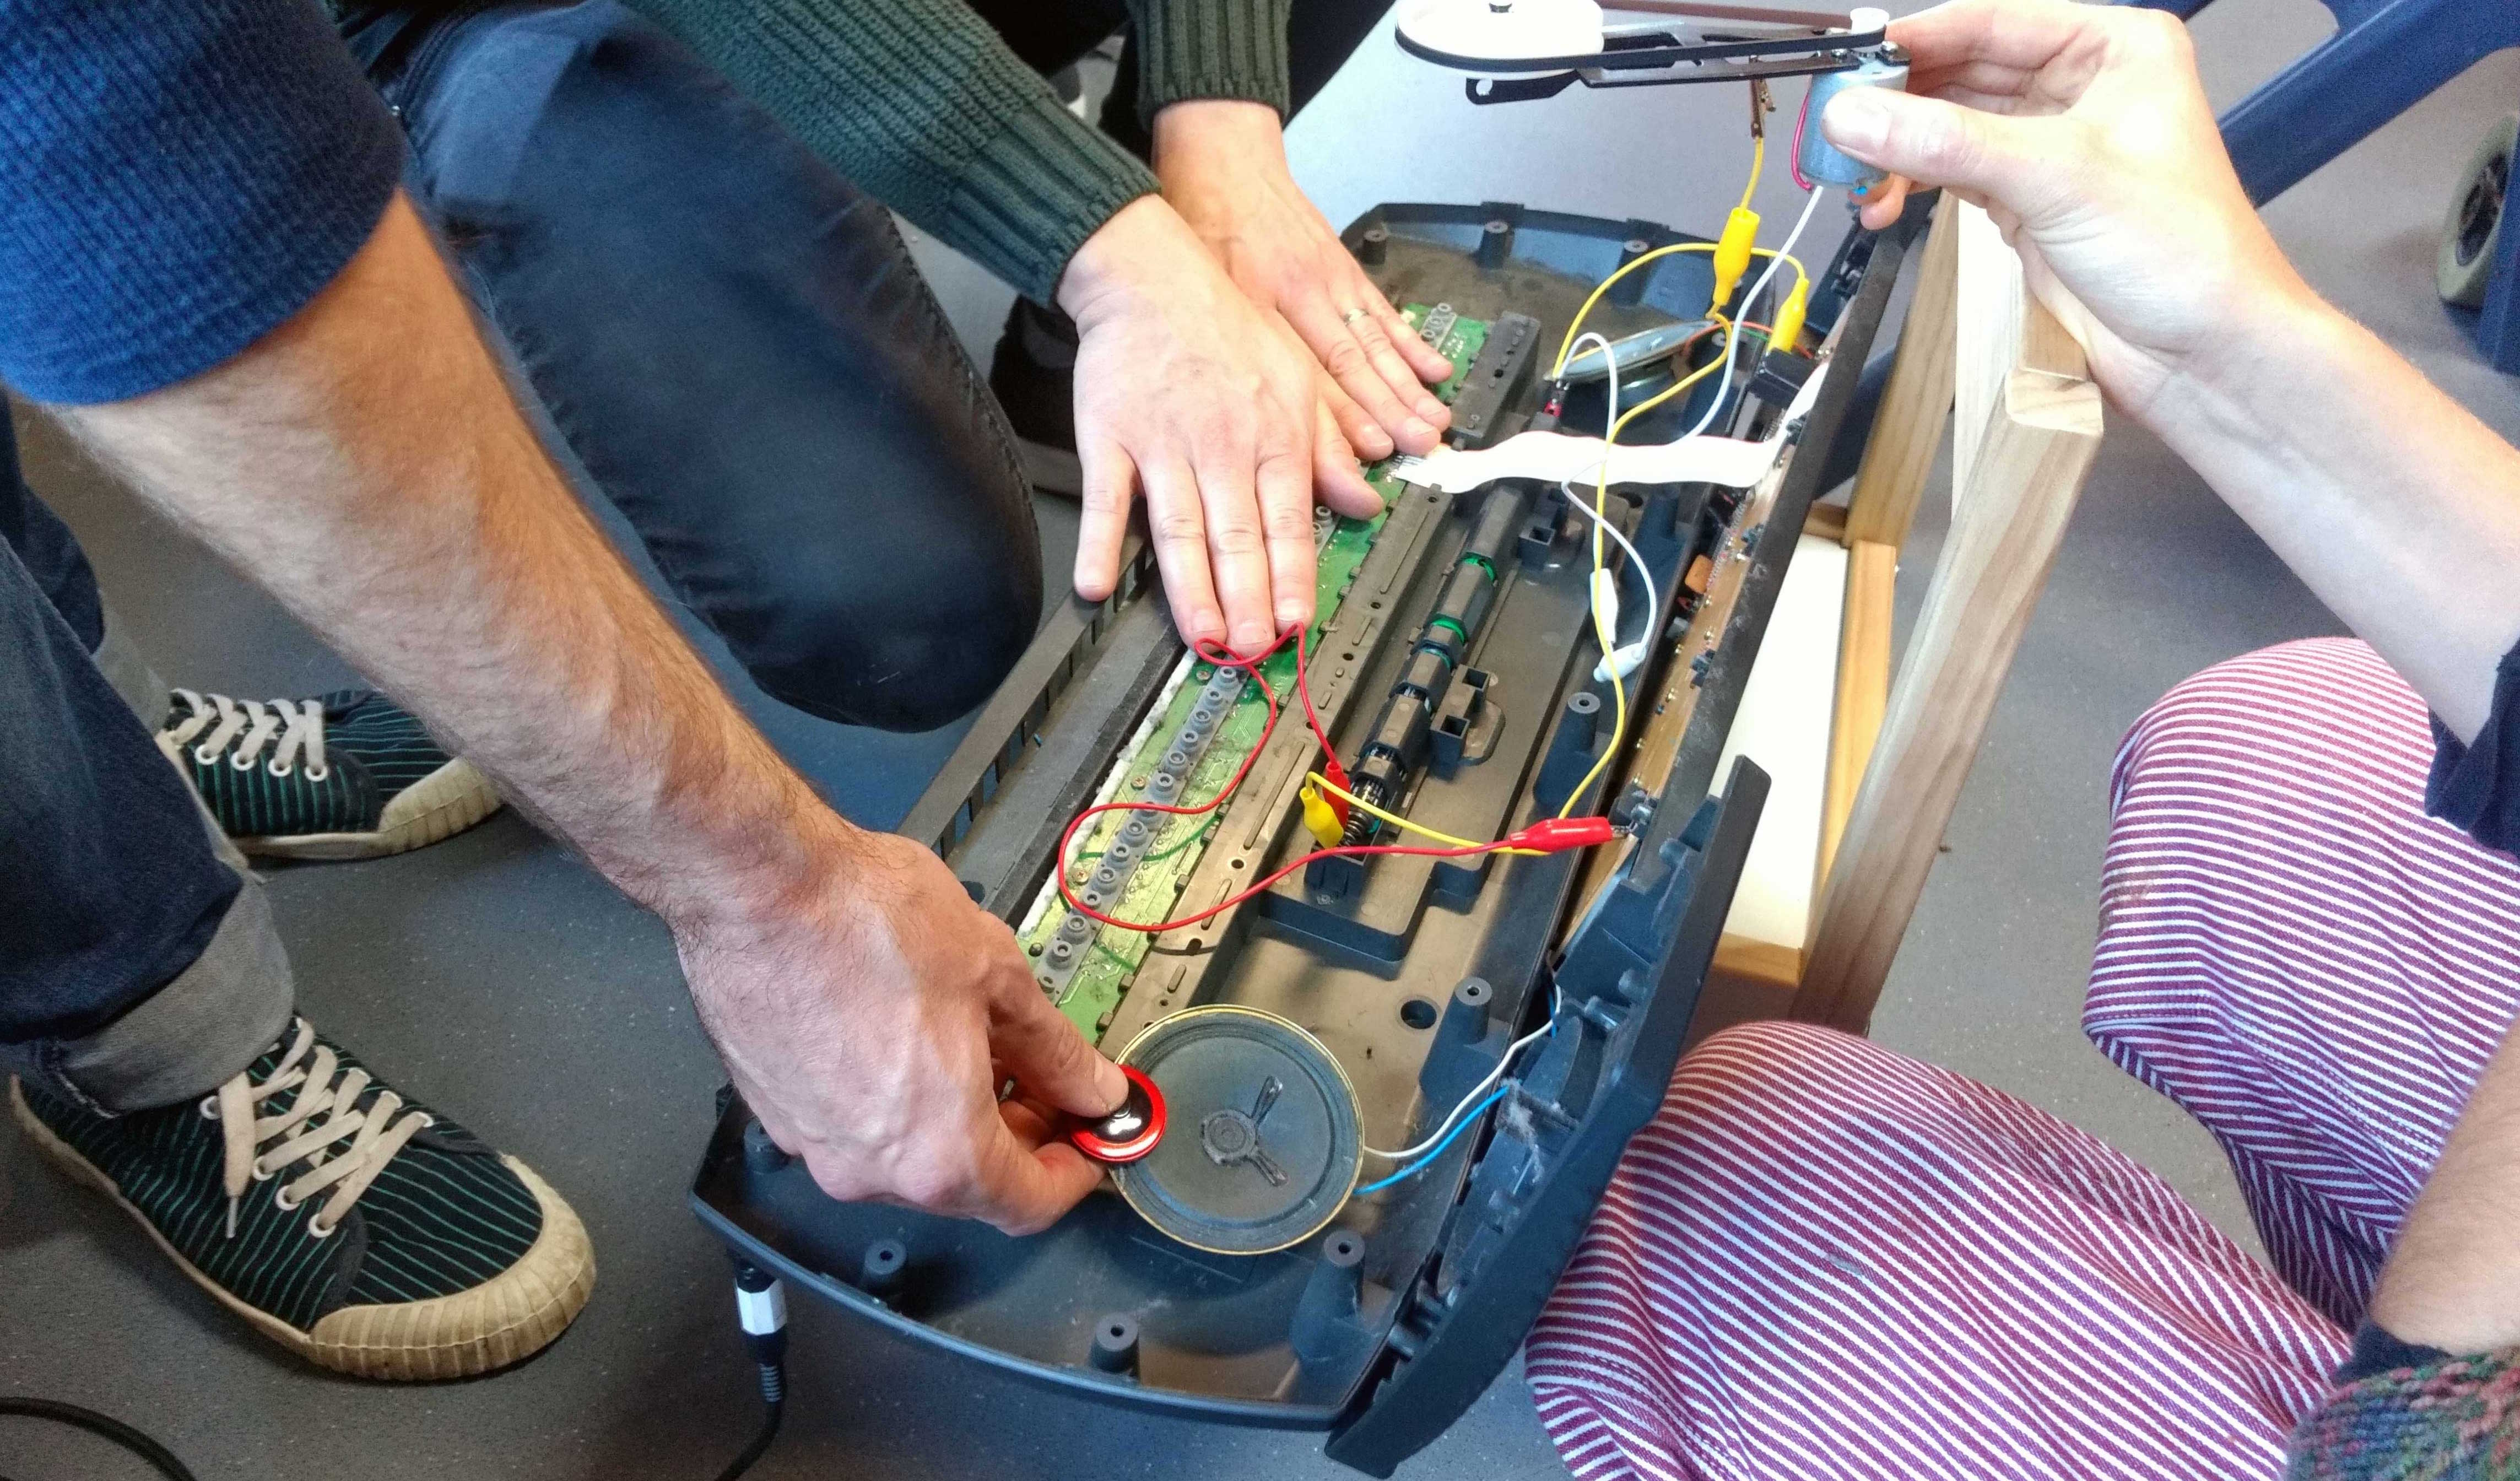
Now I have started experimenting with the electronics. I am trying to make it flicker once per image so that it will create a nice vintage flickery effect as it rotates.

These images show some early tests tinkering with ways to make it flicker once per image.

Now I have added a more sturdy cardboard backdrop because I want to make the wires hit the strips of copper tape at exactly the same time which completes the basic LED circuit and causes the LEDs to flash for a split second. Its quite tricky to get the wires to make contact with the spinning disk. Perhaps on the next prototype I will make sure that the two wires are in permanent contact with the spinning disk so that they can’t avoid making contact with the copper strips.

Here is an early test of the LED’s working. Its ok but now I need to work on making sure the disc runs at a constant but controllable speed.
The next stage is to build a wooden prototype. Cardboard is such a versatile material for prototyping which I love using but sometimes you need the rigidity of wood particularly if I am going to construct a more precise strobe effect and hand crank.


Leave A Comment
You must be logged in to post a comment.